Tuesday, May 2, 2017

Accomplishing Lifestyle Goals 101


As I mentioned in The #1 Key to Eating Healthy on a Budget, the best way to save money is to eat what you have! I know, I know....even though it saves money, it is not always convenient. I realize it can be challenging to find time to meal prep, plan ahead, or figure out ways to eat your own food on the go. That being said, it is not impossible; it merely comes down to priorities. How important is it for you and your family to eat healthy? How important is it to meet your financial goals, steward your money well, and accomplish your life goals and dreams? How important is your time?  The answers to these questions are essential for determining the focus of your time and priorities.  I realize there are seasons of life where our time is more valuable to us than our money; we would rather pay for food to be prepared and cooked for us. However, if eating healthy and meeting financial goals are important to you, it might help to take a look at the use of your time.  How much time do you spend watching TV? Playing on your phone or interacting on social media?  Basically, our time, money, and priorities need to align in order for us to see the results we wish to achieve in our lives.

Here is some food for thought: If you were able to spend a concentrated amount of time making food for your week (or even a few days at a time), would the initial time spent help you save time later on?  For example, I spent the day in Traverse City yesterday, which is about an hour-and-a-half from my house. I had to meet with a prospective student, but I decided to go shopping afterwards.  Instead of eating fast food or having to wait in line at a healthier restaurant, I was able to grab my salad and homemade granola bar from my cooler and eat on the go! I didn't have to wait for a second! As soon as I decided it was time to eat, I could do so. Not to mention, it was also healthier and cheaper.  Likewise, if I make my food earlier in the week, I have more time when I come home from work at 6:30 pm or 7:00 pm.  I can go for a walk or exercise, blog, read, or do any number of things I want to accomplish because my food is already prepared for me. I don't have to drive anywhere at lunch time and spend money to eat out, as my food is prepared and ready to go in the work fridge. I can pop it in the microwave - and voila! It's ready.  Yes, it does require an investment of my time and energy to plan and prepare meals; however, I usually receive a huge return on my investment later on.

While you are chewing on that concept for a bit, I will share one of my favorite breakfast recipes. I love having breakfast pre-made and ready to go during the week. I don’t know about you, but mornings are not my thing.  I do not wake up bright-eyed and bushy-tailed with time to get things accomplished in the morning. I tend to get up at the last minute - with just enough time to shower, get ready, grab a cup of coffee, and head out the door.  So, having some food ready to grab as I’m heading to work is essential for starting my day on the right foot.  

One of my most recent favorite breakfast foods is Overnight Slow Cooker Apple Pie Steel Cut Oatmeal posted by Samantha on her blog, FiveHeartHome.  Back when I had my intense bout with food allergies (read The Challenge is On….), I ate a lot of oatmeal. So much so, I was ready to take a break from regular oatmeal for a while.  I purchased a bag of steel cut oats – and they sat in my pantry for months. I wasn’t really sure what to do with them. I knew they took longer to cook, but I just hadn’t spent the time to figure out how to make them.  Enter stage right: Pinterest. I finally got out the ‘ole Pinterest app and began to do a little research. I found the recipe for Apple Pie Steel Cut Oats, and I was sold! It was made from “clean” ingredients (meaning there was no processed ingredients), and all of the ingredients were things I could consume! Score!  Even better, I had bags of frozen sliced apples in the freezer; they had been there for nearly a year, and I was on a mission to use them.  This was the perfect opportunity! If you have pre-sliced apples, this recipe is so incredibly easy! The hardest part is only being able to sleep 8 hours while it is cooking! No sleeping in allowed! But what a way to wake up!


Ingredients: 
1 cup steel cut oats (no substitutes)
2 medium apples, peeled and diced
2 cups apple juice (I use water, as I don’t typically have apple juice on hand - and I don’t need the extra sugar)
2 cups milk (I use coconut milk)
¼ to ½ cup maple syrup
2 teaspoons vanilla extract
1 Tbls ground cinnamon
¼ tsp ground nutmeg
¼ tsp salt
Optional garnishes: cream, maple syrup, chopped nuts, cinnamon, etc.

If you would like more detailed instructions on how to make this, please visit the link above. However, I can give you the quick version. I used a Corningware dish that fit into the base of my crockpot. I added all of the ingredients, gave it a quick stir, and poured water into the crockpot so the Corningware dish was surrounded with water except for the top inch or so.


Put the lid on, set the crockpot on low, and it’ll be ready to go 8 hours later! And smell heavenly, to boot!


Stir it up, then serve it up! Add your favorite toppings, and enjoy! (And just for the record, this makes a decent amount of food. I can usually eat 5 healthy servings throughout the week. You can also double the recipe without using the Corningware dish. The oats tend to stick on the side of the crockpot, but clean-up isn't too horrible.  Also, I know steel cut oats can be expensive. Try finding a place that sells them in bulk. They are much cheaper that way. I bought them in bulk at a local natural food store until I visited an Amish bulk food store recently! I bought a 5 lb bag for $4.95. That's a lot of food!)


Last summer, I had the privilege of hosting some relatives two nights in a row – before and after they attended a wedding not far from my house.  The first night was my cousin, her husband, and their four kids. The second night was my aunt and uncle, a different cousin, his wife, and their daughter. I wanted to be a good host and make them something special for breakfast. I had a couple of options and I was debating what to do and which option would work best for the respective families.  I really wanted to make pancakes or something for the first family; however, I was so incredibly exhausted, I knew I would not want to wake up super early the next morning to make anything. I kept coming back to this recipe. I had some frozen apples still, so it took all of about 5-10 minutes to throw everything in the crockpot, get it cooking, and head to bed.  I cannot tell you how thankful I was the next morning! First of all, breakfast was ready to go. Secondly, it won over all of the kids before they ate it, as it smelled amazing when they walked in the door (they stayed in their camper overnight).  Finally, I learned they all have gluten and dairy issues, too! My go-to breakfast recipe saved the day!

Until next time!

Sunday, April 30, 2017

Reflections of a Recovering Food Hoarder

Little did I know what I was getting myself into with this spontaneous and seemingly insignificant food challenge.  Granted, I know myself well enough to know I enjoy a good challenge of any kind.  I enjoy putting myself in situations where I have to be creative and resourceful.  I also thought it would be a fun reason to resurrect my blog.  All of these things have definitely proven true in the past three weeks.  However, there are other things I did not consider going into this $5/week food challenge.  (If you are new to my latest adventure, you can learn more about the food challenge by reading my post: Resurrection Week: Resurrecting the Blog for a Food Challenge).

Soon after starting this challenge, I realized this was becoming more of a "fast" than I initially realized. I wrote a bit about my experience in my post The Challenge is On...  Within that first week, I noticed I was having to check my typical tendencies - grabbing a quick coffee to keep me going throughout the day, grabbing a bite to eat while traveling for work, grabbing a little snack to help me make it until dinner.  While all of these things are considered normal in the average American lifestyle, I suddenly realized how often I was spending money.  Yes, I do budget my money, so I am aware of how much money I spend.  I guess what was eye-opening for me was the number of times I did not eat my own food. Or, I relied on quick fixes (which are not typically healthy).  No wonder my food was accumulating in my pantry, fridge, and freezers! I wasn't being intentional about eating it! (Which is a lot to say for someone who is pretty decent at meal prepping and cooking from scratch....)  

By the second week, I found myself trying to figure out how I could get the most food for my $5 weekly food allowance.  I wrote about this experience in Week 2: The Reveal.  I had to identify the thought patterns (hoarding and saving) taking place in my brain, and adjust them to focus on making a quality, intentional purchase that would help me in accomplishing my mission to use my food.  Interestingly enough, most of my first two weeks was also consumed with meal planning and budgeting.  Maybe it was due to the novelty of my mission, but most of my thoughts and free time were spent trying to figure out what I could make, how I could use my ingredients most effectively, and how to find the best deals to make the best, most useful purchase with my $5.

This past week, there was another major shift. This was my third week of my food challenge, and I noticed some interesting changes. First of all, I had a conference in Southern Michigan for two days.  All of the meals were covered for the conference, so I simply had to provide breakfast the first day and snacks for the remainder of the time.  The day after I returned, I worked in Traverse City (1.5 hours from my house) all day.  With my odd schedule, I found I didn't even  have time to make food this week until Thursday and Friday evenings - which means I have had an abundance of food this weekend. In fact, I have most of my food already prepped for next week!  I ended up making so much usable food last week, I had more food than I anticipated! (I will share more about that in a minute.)  I am also leaving for vacation in about a week and a half (to Alaska!!). I have a couple of items I need to use before I leave so my food doesn't go to waste.  After looking at all of my options, I am not sure I can eat everything! I have soooo much food on hand! Who would have thought that was even possible three weeks into not buying groceries.  To top it off, I have zero desire or need to go purchase something this week.  The need to buy food has greatly decreased.  Granted, that desire might return once I am back from my trip, but I found it to be an interesting shift this week!

There are a few other things I have noticed throughout this food challenge. I have been drinking a lot more water! Intentional water intake has been somewhat of a challenge for me for the past 6 months or so.  I kept finding other things to drink instead (including LaCroix, my favorite non-sweetened beverage). However, without really thinking about it, I have found myself carrying a water bottle with me wherever I go! I stop to fill it at gas stations while I'm driving, I carried it with me at the convention, and I have it with me throughout my day.  I'm sure my body is happier with me now that I am drinking more water.  I have also started losing some weight! Even though I have made some food items I don't typically eat (pie dough, empanadas, waffles, etc), and even though I have devoured every form of "snack food" I could find in my house that first week, I have been losing weight! Another bonus!  Finally, I have realized how much planning it takes to be out and about for a day.  Thankfully, I purchased a little cooler and an ice pack a few months ago.

      
This has been a lifesaver! Now, I just have to make sure I have travel friendly food prepared, and I am ready to go! Next to my water bottle, this has probably been the biggest addition to life these past three weeks.  Depending on where I go, I can easily take food that needs to be microwaved. However, I do have to think ahead if I will need to eat picnic food or other non-heated items.  With a dwindling fresh food supply, making and eating non-heated items can be a bit trickier.  It is not impossible, though! It just takes planning and adjusting.

One last thing I wanted to discuss about my experience these past few weeks: the need for fresh food.  Last Sunday, as I was prepping some food for my week, I had my first moment of panic since I started my food challenge. I suddenly realized I was nearing the end of my fresh food supply.  One of the major lifestyle shifts I have made over the years (see The Challenge is On... for more details) has been using fresh food (specifically, fresh veggies) in my cooking.  As I was hoping, my fridge is looking more and more bare the longer I do this challenge. However, that also means my fresh food supply is also decreasing. I seriously had one of those "what was I thinking?" moments, where I decided I couldn't actually carry this out; I couldn't go on without fresh veggies.  After that initial moment of panic, however, I realized I do have veggies and healthy food on hand! I have loads of beets and radishes in my fridge (along with some carrots, a little lettuce, a few peppers, lemons and limes).  I also have brussel sprouts, cauliflower, tomatoes, and greens in the freezer - and three butternut squashes in my CSA bin. Again, I might have to make some adjustments to my typical lifestyle, but it doesn't mean I can't eat healthy until my CSA veggies start arriving in mid-June.

In fact, to help myself feel better, I made some fresh beets and a veggie soup for the week!  Let me tell you, I love fresh beets! I have always loved beets - especially pickled beets. I was the odd child growing up that adored beets and lima beans. You heard that right. I loved lima beans! Mind you, I wasn't fond of every vegetable; I still remember my brother and I taking one green bean and cutting it in half when my mom told us we had to eat at least two of them.  As I grew up, my appetite for vegetables changed drastically. I'm sure part of that comes with maturity.  However, I am convinced the other reason I grew to love vegetables was due to one thing: learning to eat fresh veggies rather than eating canned ones.  Seriously. Home-canned vegetables were probably better. But there is nothing worse than eating mushy, grey vegetables from a can. Even if you reheat them. No, thank you.  Learning how to cook and eat either raw, steamed, or roasted vegetables (that still have color to them) has made a world of difference for me.

So, if you have decided you are not a fan of beets because you have only had canned beets, try cooking them fresh!  Maybe you are like me, and you never knew how to cook them fresh. I first learned how to cook beets about 10 years ago. It was the year I lived with my vegetarian friend, actually (see The #1 Key to Eating Healthy on a Budget).  Her now mother-in-law brought us some beets from her garden, and she taught us how to cook them. Since then, I have come to love roasted and raw beets, as well.  For the sake of memory lane, though, I chose to boil beets this week.  They are super simple! You can't fail.  First, you will want to chop the ends off of the beets and peel them. There are easier (and less die-your-fingers-purple) ways to take the skins off from the beets, but this is the best way to peel them for boiling. Next, you'll want to dice them (about 1 in cubes). That's a lot of beets for someone who nearly panicked from a lack of veggies a few moments earlier!


Once you have them diced, place them in a pot and cover them with water.  Aren't they beautiful?!


Bring the water to a boil and boil them for 30 mins, or until you can easily push a fork through them. They should be slightly al dente (or firm...not mushy!). Take the pot of beets off of the heat and let them sit for 30 mins (this allows the beets to regain some of the color that boils out).  Strain the beets (you can save this water to drink, add to smoothies, or use for other purposes). Cover and refrigerate them.  I love to add boiled beets to my salads, eat them in a bowl with a little apple cider vinegar, or be creative! (Also, don't be alarmed if you have colorful bowel movements after eating them! It's simply a result of the beets working their magic.)

The first salad I made was with chopped hazelnuts, a bit of feta, a touch of olive oil and balsamic vinegar, and a bit of salt and pepper.


The second salad I made was using chopped walnuts, feta, salt, pepper, olive oil, and balsamic vinegar.


They were super yummy!

In addition to beets, I also made a soup using the leftover bean broth from my garbanzo beans (Week 2: The Reveal).  I have never used bean broth for anything before, but I am learning how to be extra-resourceful with my food these days! In case you missed the last post, here is a picture of the bean broth:


Honestly, I was not very excited about this soup going into it. I knew I had a few veggies to use up, but I just couldn't quite picture the end result in my mind. I guess it involved a few too many unknown factors - even for my adventurous spirit.  I knew I had some onions, garlic, carrots, and celery I could use. I really wanted to add something with a little more "umph" to it, though.  I wanted to use potatoes, but I didn't have any. But wait! I remembered some friends telling me I could cook radishes like potatoes - and when they are cooked or roasted, they lose their spiciness. I had LOADS of radishes in the fridge.  So...I used what I had: purple radishes!


While I was making the soup, I realized it would also be a great opportunity to use some of my bok choy in the freezer! I added some salt, pepper, and a spice combo - and it was great! Superb, actually! It even looked pretty!


I cannot tell you exactly how I made this soup, as I added as I went. However, I can give you the basic outline - and grant you permission to experiment or make it better!

Ingredients:
1 small onion, diced
2-3 cloves minced garlic
3 medium carrots, diced/quartered
3 medium to large radishes, diced/quartered
1 bundle of bok choy, chopped (stems and leaves)
5-6 cups bean broth
1 Tbls of coconut oil
1 Tbls of 10-Spice Blend

10-Spice Blend (from Angela Liddon's Oh She Glows Cookbook - one of my favs!!!)

2 Tbls smoked paprika (can be purchased inexpensively at Trader Joes, if you have a hard time finding it)
1 Tbls garlic powder
1 Tbls dried oregano
1 Tbls onion powder
1 Tbls dried basil
1 Tbls dried thyme
1 1/2 tsp freshly ground black pepper
1 1/2 tsp fine-grain sea salt
1 tsp white pepper
1 tsp cayenne pepper
**This makes about a 1/2 cup of spice blend. I use it quite often for soups and such, and it probably took me about a year to use it all. It's fabulous!

Instructions:

To begin, heat the coconut oil in a soup pot.  Once it has melted, add the diced onion and garlic. Saute until onion is translucent. Add diced vegetables and saute for about 10-12 minutes. Add bean broth, season with salt, pepper, and spice-blend. Bring to a boil. Boil for about 20-30 minutes. You want to be able to easily pierce the veggies with a fork, but you don't want them to be mushy. No one should ever be forced to eat mushy vegetables. Serve and enjoy!

Until next time!

Sunday, April 23, 2017

Week 2: The Reveal

Well, I am excited for this post, as I have a few surprises for you! This was one of those weekends where I had ideas on how things were going to go....and everything changed. So, I guess it brought some surprises for me, too! I don't know about you, but I love surprises (as long as they are the good kind!).  If you have recently tuned into my $5/week food challenge and you would like to learn more about what in the world I am doing, please read Resurrection Week: Resurrecting the Blog for a Food Challenge.  You can also learn more about the motivations behind my challenge by reading The Challenge is On...

First off, I wanted to share my fun afternoon adventures with you. I was feeling incredibly tired and unmotivated earlier today. Do you ever have those days? I knew I had a lot I needed to do, but I just couldn't quite bring myself to get started.  As I often tell my prospective students (I am a college recruiter), getting started is the hardest part. It's just as true in life as with returning to school.  So, once I finally got moving, I managed to conquer quite a bit! I started by cooking chickpeas in my Instant Pot.


I got an Instant Pot for Christmas a little over a year ago. However, the first year it was in my possession, it sat in a box in my unpacked bedroom. I just didn't have a place to put it, so I couldn't get it out of the box. I have since solved that issue, and it now resides proudly on top of my refrigerator.  That was about 3 months ago. And in that time, I have only managed to make Greek yogurt.  Cool, yes, but I'm thinking it could probably serve a little more purpose in my life than making yogurt. I have just been so intimidated by it.  I read all these posts on Facebook or Pinterest about the Instant Pot, and I know it can do amazing things! I just needed to take some time to figure it out. Again, getting started is the hardest part! And today was the day to face my fears.

A couple of years ago, I experienced the beauty of cooking dried beans. I typically cooked them in a crock pot (also super simple, if you don't happen to have an Instant Pot). It took some time, but they were sooo easy! One package of cooked beans (which costs between $2.50 and $3.00, typically) makes about 5 cans worth of beans. They taste better - at least I think so, and they are fresh. You don't have to worry about the preservatives or the contamination from the can.  What really pushed me over the edge is when I learned how beautifully beans freeze! It's true! Whenever I am in need of some beans, I will cook up a big batch, use what I need, and then freeze the rest. It's that simple. They hold their texture and shape very well in the freezer. I also freeze them in 2 cup increments, so they are easily accessible for recipes.  I am planning to make a quinoa salad with chickpeas soon, so today was the day my dried chickpeas met the Instant Pot.

I realize you don't have to soak your dried beans with an instant pot; however, I have heard there are benefits for doing so (more than just saving time). So, I soaked my beans overnight.  Once I drained the beans, all I had to do was throw them in the Instant Pot, add water enough to cover them about 3-4 inches, push the Manual button, reduce the number of minutes to 25, lock the lid - and let it do it's thing! It was that simple.  It does take awhile for the pot to build up pressure. It also takes some time for it to naturally release, especially if it full of beans and water.  Altogether, it may have taken a couple of hours; although, I was a little preoccupied during part of the process, so I am not totally certain how long it took from start to finish.

When I strained the beans, I kept the bean water, as I learned it can make a great broth for soups or other things! That is now on my list of things to do this week (one of my surprises!). I don't have room in the freezer for all of it, so I will now be making veggie soup! Stay tuned! 


That is a lot of beans and bean broth right there! I was feeling slightly overwhelmed, as I came away with a lot more usable food than I anticipated, but I was able to find space for most of it in the freezer.

While the beans were cooking, I used my time to put together some muffins. I had some organic blackberries and blueberries in the fridge that had seen better days, if you know what I mean.  They are perfect to add into baked goods at that point! So, I saved them from becoming compost - and made Maple Mixed Berry Muffins from Amy's Healthy Baking blog.


For this recipe, you will need:

2 cups whole wheat pastry or gluten-free flour *see her note on gluten free flours (I actually used oat flour for this ingredient...if you don't have any on hand, you can grind some in a coffee grinder or hand blender!)
3/4 tsp baking powder
3/4 tsp baking soda
1/4 tsp salt
1  Tbls coconut oil or unsalted butter, melted and cooled slightly (I used coconut oil)
1 large egg, room temperature
1 Tbls vanilla extract
1/2 cup maple syrup
1/2 cup plain nonfat Greek yogurt (I used plain milk kefir)
1/2 cup nonfat milk (I actually forgot to add this, but they turned out fine! I think because the consistency of kefir is a cross between milk and yogurt, so it is a little runnier)
1 1/2 cup frozen mixed berries.

For more detailed instructions, check out the recipe link above. Basically, mix the dry ingredients together and the wet ingredients together. Then, combine the two. Fold in the berries, and you are all set to go!  Bake them at 350 degrees for 29-33 minutes (I baked mine for about 20 minutes, and they were done). I also topped mine with a wee bit of cinnamon sugar mix, as I saw it hanging out in my cupboard - and I happen to be on a mission to use up things that have been hanging around for quite some time. This is obviously optional.


For oat flour muffins, I was impressed by their consistency! Typically, oat flour muffins tend to be quite small and a little more dense. These actually had the consistency of a regular muffin. They were pretty awesome!


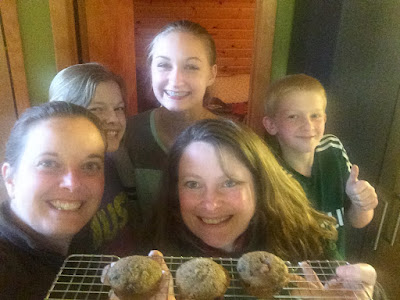
Even better, I had some surprise visitors stop by shortly after they came out of the oven: my sister, two of her kids, and a kid's friend.  They declared the muffins were "kid approved" and they could have eaten all of them! After they left - and I snagged one more muffin - I had 4 left for the freezer!


My final adventure of the afternoon was planting potatoes! I was inspired last week, after finding my final basket of CSA potatoes had decided they were ready to reproduce (I will spare you the picture). I was still able to use them for my recipes, but I decided to use the "eyes" and plant some of them! I have never planted potatoes before, so I will let you know how they go!  In fact, I had so many I gave some to my sister for her garden, too.


You can also see my herbs starting to come up in the back of the plot! I've been excited to see those growing!

It's amazing what happens once you get in motion, right?! Here I had been feeling so sluggish and unmotivated, but I was amazed by all I accomplished by the end of the day!

Now on to my real reason for this post: the $5 weekly food purchase reveal. I have to say, I had to deal with some interesting thought processes this week. At the start of the week, I noticed Meijer (a regional grocery store, for those of you not from the Midwest) was having a 10 for $10 sale this week! The resourceful food hoarder in me was delighted; I could buy 5 items with my allowance this week. They had some great items on sale. The problem was I didn't necessarily need most of those items, and many of them were items I wouldn't typically eat anyway. So, most of my week, I kept trying to figure out how I could get the "most bang for my buck."  Finally, I came to the realization that my goal is not to accumulate more things because they are a good deal and I can afford them. My goal is to purchase items that will allow me to use the food I have to make complete meals. (Also see The #1 Key to Eating Healthy on a Budget.) With this focused purpose in mind, I was delighted to discover Grain Train, a natural food store in Petoskey, had natural, uncured bacon for $4.99!!


I realize bacon is not healthy. However, there are times in life when you just need a little to complete the right dish. I have two dishes I have been wanting to make - and both required a little bacon. I had nearly given up on my ability to purchase good bacon with my allowance. So, this was definitely a fun surprise for me! I had also been meaning to purchase cilantro...but I decided that could wait for another week. Stay tuned for the recipes requiring bacon! One is my favorite spring dish. The other is a dish I have been gathering ingredients for a year to make! I'm thinking it will finally manifest in the next few weeks.

Just so you can see for yourself, I have provided you with a picture of the receipt:


I have $.01 to add to my change jar, for a total of $.09 left for future purchases.  And just for the record, I had looked at a couple of other stores to find "good" bacon, and it was all over my price range.  I realize natural food stores have a stigma for being expensive, but sometimes they actually have good deals, too! You just have to look for the right products or find what is on sale.

Until next time!

Friday, April 21, 2017

The #1 Key to Eating Healthy on a Budget

Follow my blog with Bloglovin

I still remember back to my first summer in Lake Tahoe.  I had a friend come over to visit, and she was a vegetarian. Eeek! I was from Michigan - land of comfort food, jello salad, and all-things non-vegetarian. I had absolutely no idea what to make! I began frantically looking through magazines and cookbooks to find a couple of options. I chuckle at this now.  A little over a year after this visit, I became roommates with that vegetarian. Even though I continued to eat meat, I learned a lot about cooking and preparing veggies, eating fresh food, and eating the "Californian way" - which typically included avocados. Avocados in California were like baking soda in other parts of the country. It was a staple in most pantries, and people were able to bring them out to add to a dish at a moment's notice. It was fascinating to me.

Although I learned a great deal about eating healthy while living in Lake Tahoe, my healthy food skills went to a new level when I dealt with all of my food allergies (see The Challenge is On....).  All the while, my food budget has not changed too dramatically.  I shared a bit of my background and life experience with you in my last post, The Link Between Argentina, Lake Tahoe, and Colorado, so you can see there were times when I have had very little money.  In order to pay all of my bills and not go further into debt, I had limited resources in the area of my food budget.  My first couple of years in Lake Tahoe were especially tight.  During that time, my food budget was set to $80/month.  Yes, you heard that correctly.  Most people are shocked when they hear that amount, but it's true.  At the time, I didn't limit myself because of a simple food challenge; I simply adjusted my lifestyle to match my income (and my location of choice - let's face it, it costs money to live in beautiful places).  It definitely took some creativity and strategic planning, but I actually ate really well for $80/month - in a resort town, nonetheless, where food prices were quite a bit higher than other areas of the country.

Needless to say, as my circumstances in life have improved, so has my food budget.  The improvements have been incremental, though.  There were a number of years when I lived off of $120/month.  In more recent years, I have bumped my budget up to $160/month - prior to signing up for my CSA share.  Now that I have a regular supply of fresh, organic vegetables and eggs at my fingertips, I have decreased my food budget to $110/month to account for the cost.  Yes, I am single; however, I feel like I could probably feed 2-3 people (and sometimes more!) on a regular basis. I love to cook and bake for others, and I do so often. I buy as much organic food as possible; however, there are times I choose to buy non-GMO food, or food that does not contain hormones or antibiotics rather than organic.

Why do I share this information? I am definitely not trying to prove how amazing I am. As you can see, I have come a long way in learning how to eat, appreciate, and cook healthy food.  There is still room for growth, and I am not always great at eating well. If I have a busy week or I am stressed, my eating habits tend to slip.  So, no, my goal is not to prove I am a better, healthier eater than you.  My goal is simply to demonstrate that eating healthy does not have to "break the bank," so to speak.  How often have you heard (or said) the phrase: it's expensive to eat healthy?  This is a common belief among the general population.  I would love to break down the misconception that eating healthy is impossible or an unattainable goal for those who may not have a lot of money.  Instead, I would like to propose that it can be expensive, but it doesn't have to be.

I do realize the cost of food increases with the number of people in a household; however, I believe some of the things I have learned from my experiences could benefit families of any size.  As I mentioned, I have grown a lot in the area of healthy cooking and eating.  I think the concept that most transformed my ability to eat healthy on a budget was this one simple, common sense principle: use what I have.  I know it sounds too simple, too easy. It was really life-altering, though, when I started implementing this practice. In the past, I would be in the mood to eat a particular meal or make a certain recipe, but I didn't have many of the ingredients. So, I would go buy them.  It costs a lot of money to buy multiple ingredients for an individual meal.  In practicing the "use what I have" concept, I would look and see what I had available, create a meal plan, and buy one or two essential ingredients that would allow me to make a whole week's worth of food (or more).  When I first bought into this practice, I was living on $80/month.  During that time, I was also actively involved in our church's adult Sunday School class. Once a month, I would make breakfast for 30 or so people.  I loved making food for this group of people, and I did so with a joyful heart.  I also found it was very doable when I practiced the principle of using what I had on hand. (I can't say all of this food was incredibly healthy, but it was good!).

This is a principle I continue to practice in my life - in multiple areas, actually, not just with food.  In fact, I had the opportunity to practice this concept this past weekend, while I was prepping my food for the week.  I wanted to make the empanadas to use the remaining CSA potatoes, but I realized I had more potatoes than I needed for the empanadas.  Originally, I was planning to make Apple Pie Steel Cut Oats for my breakfast this week. Instead, I went with the flow - and used what I had on hand: potatoes.  I realized I had just enough to make a recipe from my new favorite cookbook: the Whole Life Nutrition Cookbook: A Complete Nutritional and Cooking Guide for Healthy Living, by Alissa Segersten and Tom Malterre.  If you are still a fan of real cookbooks, I highly recommend this one! There are loads of wonderful recipes - all of which I can eat!


Vegetable Frittata with Potato Crust 

2 teaspoons organic butter or extra-virgin olive oil, plus more for greasing the pie plate
2 cups grated potato (about 1 large baking potato, scrubbed)
1/2 teaspoon sea salt
1 small onion, diced
2 garlic cloves, finely chopped
1 small red bell pepper, diced
1 1/2 cups finely chopped broccoli (I used a bag of frozen kale)
1 1/2 teaspoons dried thyme (I used fresh lemon thyme, as I had it growing!)
       1/2 teaspoon freshly ground black pepper
1/2 teaspoon sea salt or Herbamare
6 large organic eggs, lightly beaten
1/2 cup grated raw organic Jack cheese (optional - I used a sprinkle of feta, since I had it on hand)


Preheat the oven to 375 degrees. Oil a 9-in deep-dish pie plate with olive oil or butter.

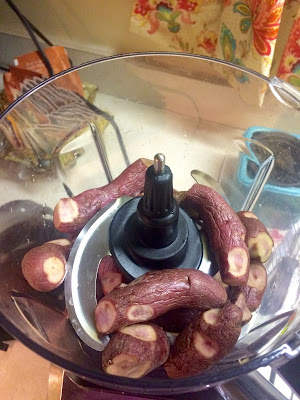
Grate the potato. (Don't mind that mine are purple).


Place the grated potato into a small bowl with the sea salt.  Let rest for about 10 minutes. Squeeze out the excess water, and transfer the grated potato to the prepared pie plate and press evenly into bottom of dish.


 In a medium skillet heat the 2 teaspoons olive oil or butter. Add the onion and garlic and saute over medium heat until soft, about 5 minutes.


Transfer the cooked onion and garlic to a bowl with the pepper, broccoli, thyme, black pepper, and sea salt and mix well.


Add the eggs and cheese and mix well. Pour the egg and vegetable mixture over the potato crust. Sprinkle the top with extra grated cheese if desired. Transfer to the oven and bake for 25-30 minutes, or until the eggs are cooked through.  (It says it yields 4 servings, but I had 6 servings).


Have you found creative ways to use the ingredients you have on hand? Please share in the comments below! And stay tuned for continued updates on the $5/week food challenge. (Read Resurrection Week: Resurrecting the Blog for a Food Challenge for details on my food challenge.)

Tuesday, April 18, 2017

The Link Between Argentina, Lake Tahoe, and Colorado

What do Argentina, Lake Tahoe, and Colorado have in common? Empanadas, of course!  I'm sure that was the first thought in your mind, right? And you still might be baffled as to how I connected empanadas to all three of those locations. Well, let me share a few stories with you.

My freshman year of college, I attended Colorado Christian University in Lakewood, CO.  Even though I grew up in Southern Michigan, it had been my dream to live in Colorado since I was in the 2nd grade. As soon as I was able to move out of the house, I was off to make my dreams come true!

Shortly after school started, I began looking for jobs. I still remember the fateful day I interviewed for a job at MetLife in downtown Denver. I thought it was be so "romantic" to have a job downtown. Oh, my! Inadvertently, I parked on the opposite side of the downtown area and I had to literally run across town to make it to my interview on time. I showed up with flushed cheeks and windblown hair just as the interviewer was about to give up on me. He ushered me into a room and asked me what I knew about MetLife. I literally said (very hesitantly), "I've seen the Snoopy commercials on TV..." Yikes! I still cringe when I think back to that day.

Needless to say, I didn't get the job.  A few days later, however, I saw an add for Granny Scott's Pie Shop!!! It was in Lakewood, not too far from the college. Perfect! I loved to bake and it definitely sounded more "me" than an office job with Snoopy.  I called them up, and they basically hired me over the phone. I did show up for an interview, but it didn't take long before we were discussing when I could start. Without even realizing it, this was what I was made for: making pies! Or baking, in general, I guess. It was probably one of the most fun jobs I have ever had.  My first day on the job, I got to use my hands to mix 11 lbs of shortening, 5 lbs of butter, and more flour than I could imagine in one tub.  I might be off on my quantities now, but it was a lot.  So much of my love for baking, excellence in cooking, and courage to try difficult dishes stemmed from that year at "my" pie shop. I can't imagine my life without that experience.

Along with pies, we also made a number of savory items - most of which included the use of pie dough in some way.  One such item was beef empanadas, a half-moon shaped filled with meat, potatoes, veggies, and mexican seasoning.  They are still one of my favorite things to order when I go back to visit - as long as I can get some melted cheese and salsa on top!

Fast forward nearly 9 years. I was living on a mountain top pass in Lake Tahoe and working for a chiropractor.  One of my favorite things about my job at that time was talking with all of our patients. For most of my time there, I was in charge of doing the therapies that followed the patients' adjustments.  This allowed me to get to know the patients and talk to them about all kinds of random things.  For example, one of our patients was a runner from Argentina.  I am fascinated with Spanish-speaking cultures, so I would often talk to her about her country; more often than not, the conversation typically involved their food. I remember asking her what type of food they typically ate in Argentina. She went on to describe all the ways in which they eat empanadas! Seriously! Empanadas were extremely popular there - all flavors and types.  However, they were not spicy empanadas, like I had eaten. There were basil, tomato, and mozzarella empanadas. Tuna and cheese empanadas. Chicken empanadas. There were all sorts of different kinds! One of her favorites (and I believe one of the more popular kinds) was a simple beef empanada: ground beef, potatoes, and carrots cooked in beef broth, and lightly seasoned with salt and pepper.

Now, shortly after that, I went through a season of being extremely poor and not having a car. I am not sure what brought it about, exactly. I just remember I needed a starter on my car, but I didn't have the money to buy one at the time. So, I figured out how to use the local bus system and walked to my various jobs.  This particular time lasted a few months. I was able to pay all of my bills, but there were times when I literally only had enough money to pay the bus fare to make it to my next job.  And I had to go to that particular job to have enough money to pay for my bus fares later in the week. It was a very interesting time.  As suddenly as it came on, it also left.  About a year later, my car died altogether. I sold it for parts, and I went back to using the local transit system and walking 7-13 miles a day to get to and from my various jobs.

It was during those times, however, that I learned how to be very creative with the food I had in my house! I have always been a foodie, and I tended to accumulate food very easily. I would find good deals or have ideas on how I would use particular items. So, while I was without transportation and didn't have any extra money, I did what I could to take control of my life: I made food.  One of the most memorable food adventures during that time were empanadas - inspired by our Argentinian patient. Altogether, I made beef, curry potato, chicken, and caramel apple empanadas.  They were awesome! They required a little bit of time (which I had) and very simple ingredients (which I had). They also froze extremely well! I was able to freeze packages of empanadas for my mom and sister's visit.  We had various flavors of empanadas all throughout the week!


I am happy to now add Northern Michigan to my list of empanada locations! Maybe it was the "making food on a low budget" concept that brought back my fond memory.  Or maybe it was the remaining CSA potatoes that desperately need to be used.  Whatever the case, I spent my Sunday trying to recall exactly how I made these empanadas nearly 6 years ago.  I had to be a little creative with some of my ingredients, based on my current food challenge - but I wasn't disappointed!


Argentinian Beef Empanadas
2 recipes of pie pastry (recipe to follow)
1.25-1.5 lbs ground beef
2-3 potatoes, diced
4-5 carrots, diced
1 carton beef broth  (I used pork bone broth, since I had some on hand - and it worked great!)
1 medium yellow onion, diced
3 cloves garlic, minced
salt to taste
pepper to taste 
 
Kitchen Aid Pie Pastry
(I use the Kitchen Aid recipe, as it is the only one I have found that uses shortening and butter - both of which I learned were necessary for a flaky crust while working at the pie shop) 

2 1/4 cups all-purpose flour
3/4 teaspoon salt
1/2 cup shortening (I use organic, as it does not contain partially hydrogenated oils)
2 Tbls butter, well chilled
5-6 tablespoons cold water (though I typically need at least double this amount)

I suggest starting with the beef filling, as you can make the pie dough while the filling is cooling.  Start by placing the ground beef, onion, and garlic in a large skillet on medium high heat.  Let it cook until the beef is no longer pink. Drain the excess fat, if necessary.


While the beef is cooking, dice the potatoes. I leave the skins on, as it is easier - and it adds more vitamins and fiber to your diet. At least that is what my mom always told me as a kid. :) My potatoes also happened to be purple, but don't let that deter you.


Once the fat has been drained from the beef, add the diced potatoes, carrots, and beef broth. Season with salt and pepper.


It should look pretty soupy.  Bring the mixture to a simmer/light boil on medium high heat. Let it continue to cook until the broth has been reduced to a thick sauce. It shouldn't be very runny at all, as that will make the pie dough wet.  This takes a little time. Feel free to wash the dishes while you wait.


Once the beef broth is no longer runny, remove the mixture from the heat.  While it is cooling, prepare your pie dough.  Place the flour and salt in the bowl, and stir well with a fork.  Add shortening and chilled butter.  As I mentioned, an old roommate of mine (with the help of another friend) got me started on using organic shortening, as it does not use partially hydrogenated oils. I rarely use the shortening any more (it's been awhile since I've made pies), and I found some older containers in the back of my cupboard.  I'll be ready to get them out of my pantry and free up some space!  It does help make one feel slightly better about eating pie dough, though. :)


Wash your hands and remove all rings.  Use your hands to "rub" the mixture together, by rubbing your hands back and forth.  This ensures the butter and shortening rub together, which creates the flake. Repeat this until the butter and shortening are well incorporated and crumb-like.


Add water. I typically add double the amount called for in the recipe to start. Then add a Tbls at a time until the mixture is no longer floury, but not too wet.  Be careful to toss the mixture together, rather than knead it, like you would bread.


At this point, I break off chunks of dough to make smaller "pucks" (our term from the pie shop). They should all be similar in size - about the size of a small fist. I was able to make about 8 medium/large empanadas with this recipe. You could make smaller ones, too.


Spread some extra flour on the counter, and proceed to roll out the first puck into a small circle.


Fill half of the circle with the cooled filling, leaving an inch or two around the edges.


Fold the empanada in half.


"Crimp" the edges of the empanada. I typically hold my left finger on the dough, and use my right forefinger to fold the dough over. Repeat until the entire edge has been crimped.


Place a piece of parchment paper on a cookie sheet. Carefully place the finished empanada on the parchment paper. Once the cookie sheet is full, freeze the empanadas for 20 mins to an hour, until they are hard.


After they are hard, pull them out and wrap them in plastic wrap, to protect them. Place in a freezer-safe ziploc bag and freeze!  When you are ready to eat them: place an unwrapped empanada on a cookie sheet and bake for 35-40 mins at 350 degrees. You could brush the tops with egg to give it a golden hue, though it is not necessary.  


It may look rather plain, but it definitely hits the spot! And it is an easy meal to make for those nights you get home from work late and you don't feel like cooking. Rather than eating out - grab an empanada! If you are like me, you may want to add a little ketchup and hot sauce on top! Yum!


I was able to make about 8 empanadas with this recipe.  I initially made 3 recipes of pie dough, as I wasn't sure how much I needed. I had about 1.5 recipes remaining after the empanadas. I divided them into 3 larger pucks (almost double the size of the empanada pucks).


I wrapped them in plastic wrap, placed them in a freezer-safe ziploc - and I have pie dough ready for a special occasion (or that time when you realize at 8 pm you need to have a pie ready for the next day and you cringe at the thought of making pie dough).